Tags are a great way to segment your audience in email marketing, allowing you to group subscribers based on interests, behavior, or any other criteria you define. Here’s how you can add tags to your subscribers in SendInbox:
1. Manually Adding Tags #
Individually to One Subscriber: You can add tags directly to individual subscribers by editing their profile and manually assigning tags.
2. While Importing a CSV #
Create a Field for Tags: Before importing, ensure your list has a field called {SUBSCRIBER_TAG} or something similar to store tags.
Add a Column in Your CSV: In your CSV file, add a column for tags and input the relevant tags for each subscriber.
Map the Field: When importing the CSV into SendInbox, map the tag field from the CSV to the corresponding tag field in your list. This will automatically assign tags to subscribers as they are imported.
3. Add Tags via API #

API Integration: SendInbox provides an API that allows you to add or remove tags for subscribers programmatically. This is useful for automating the tagging process based on user actions, like when someone signs up for a specific offer or makes a purchase.
By using these methods, you can easily segment your audience, making it easier to send targeted and personalized email campaigns.
Note: To create a tag, simply type the tag and press Enter. Your tag-based automation is now ready to go!
How to Segment a List Based on Tags in SendInbox #
Using tags to segment your list allows you to target specific groups of subscribers with tailored emails. Here’s how to create different segments based on tags:
1. Create a Segment Containing a Specific Tag #
- Go to your list and choose the Segmentation option.
- Select the condition to filter subscribers based on a specific tag.
- Choose the tag you want to target, and the segment will include all subscribers with that tag.
2. Create a Segment Containing Multiple Tags #
- To create a segment that includes subscribers with multiple tags, add multiple conditions to your segment.
- You can set the condition to include subscribers who have any or all of the selected tags. For example, you can target subscribers who have both tags.
- This allows you to target subscribers that fit several categories at once.
3. Create a Segment That Excludes a Tag #
- When creating a segment, add a condition that excludes a specific tag.
- This will ensure that the segment only includes subscribers who do not have the excluded tag. For instance, if you want to target everyone except those marked as “Unsubscribed,” you can exclude that tag.
Note: The tag condition will only segment subscribers who have been assigned a tag. If a subscriber has no tags, they will not be included in the tag-based segmentation.
By using these segmentation options, you can create highly targeted lists and ensure that your emails reach the right audience.
How to Send an Email Campaign to an Audience with a Tag #
Once you have created a list segment based on tags, you can easily send an email campaign to that particular audience. Here’s how:
- Log in to your SendInbox dashboard
- Go to Campaigns
- Select Regular
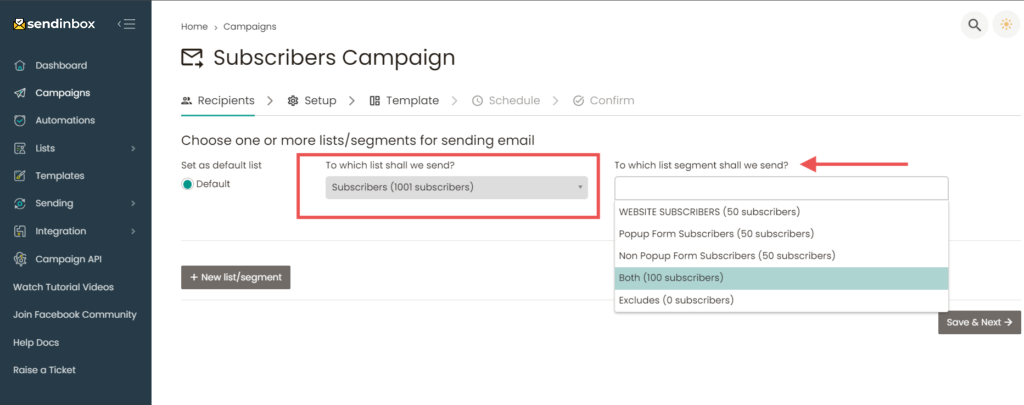
- Choose your list
- Select the segment based on tags
- Enter your Subject Line, FROM Email, and Name, and adjust the settings
- Choose your template
- Then send or schedule the campaign
That’s it! You’ve successfully sent a campaign to a segmented audience based on tags, ensuring your emails reach the right people with the right message.
How to Send an Email Campaign to an Audience with a Tag Using Automation #
- Go to Automations in your SendInbox dashboard
- Select Tag-Based Automation
- Add the tag
- Choose the list or segment
- Confirm the setup
- Add email or conditions and activate the automation by toggling the Paused button
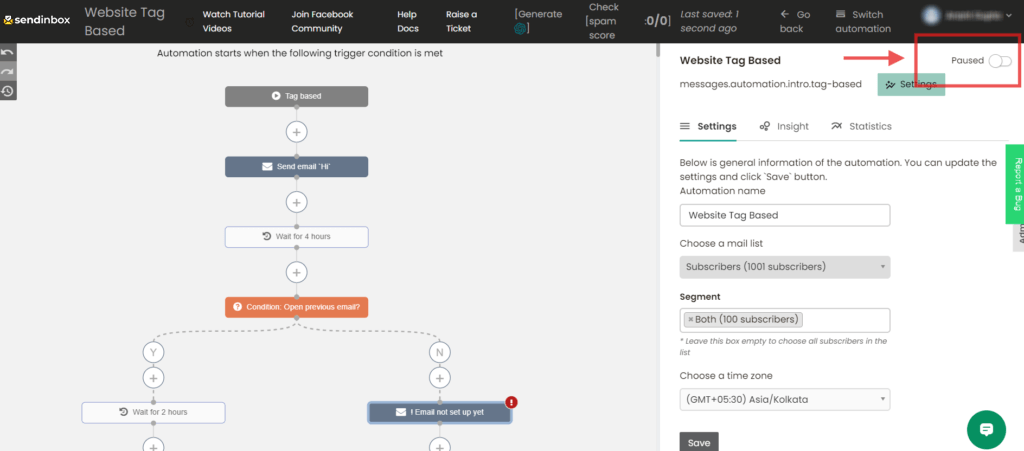
With your tag-based automation now fully set up and activated, you can effortlessly send targeted emails to the right audience at the right time, ensuring your campaigns are always relevant and impactful.


